|
|
|
|
 |
|
. |
|
||||
copyright ©1999-2005 |
thereby
hangs
a
tale
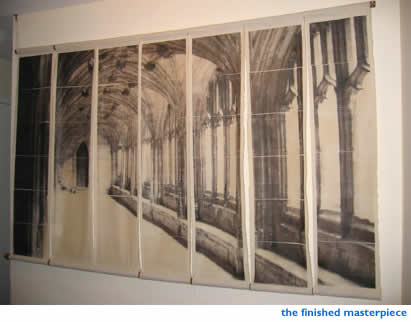
how to make a giant fabric photo wall hanging
by Jen Hinst-White |
1
2 3 continued from page 2 Mark on the fabric where you want the top of the column to start, so you can start at the same height on every strip and end up with a level top edge. As you iron your transfers one by one to make your first vertical column, try to overlap the edges of the transfers by just a smidge. I didn't do this carefully enough and so ended up with a gap between my first two transfers, which I then had to repeat on the whole hanging so it wouldn't look like a careless anomaly. Note: If you're using one big piece of fabric instead of strips like we did, you'll have to reverse the order of the columns as you iron them on: If you have 6 columns, column 6 will become column 1, column 5 will become column 2, and so on. (The easiest way to see this concept is to take a small picture on a piece of printer paper and cut it up into columns, then flip each one over, hold it up to a window so you can see the reverse image, and reassemble them to make your picture.) hanging Drill your holes and run a loop of twine through each one. Now measure the distance between the two holes and then install two hooks in the ceiling from which to hang the loops. Hang it up, run the second rod through the bottom hems of the strips, and you're done.
Alternative to hanging: You could also starch your Rasterbation to the walls. This could be especially beautiful with ragged-edged fabric in a different color than the wall. get the printer-friendly directions! o Jen Hinst-White is a freelance writer and web designer. She's working on a novel about tattoo artists, fake psychics, Gulf War Syndrome, embezzlement, un-schooling for teenagers, bathroom graffiti, and the juicy secrets found in basements. check
out these related articles: ---------------------------> lounge . nourish . host . laze . home. |
||||||

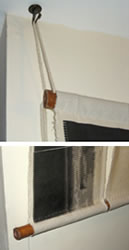 Sew your hems on the top and bottom of each strip. Now run one of the
rods through the top hems of all your fabric strips in order, so they
line up to make one big image. If it's all good, center them on the rod
and mark a dot a few inches from the end of each rod (that's where
you'll be drilling).
Sew your hems on the top and bottom of each strip. Now run one of the
rods through the top hems of all your fabric strips in order, so they
line up to make one big image. If it's all good, center them on the rod
and mark a dot a few inches from the end of each rod (that's where
you'll be drilling).