| .. |
got
a question?
don't be a
wallflower! jump
to the discussion boards
and ask away.
|
copyright
©1999-2000
DigsMagazine.com.
|
|
|
the
Furniture
FACELift
Fiasco,
a
cautionary tale in two parts |
1 2 3 4
5
|
PART ONE: Re-Finishing
Step one: It comes undone.
If
it was put together, it can be taken apart. Figuring out exactly
how was, for me, the fun part (I like puzzles). |
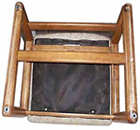
| After examining the chair, it seemed obvious to me that the
easiest thing to remove would be the bottom cushion. The base was
screwed down to the wooden frame, and once the screws were removed, the
cushion came off easily. I then examined the back cushion, which wasn’t
screwed to anything but did, I noticed, have metal runners on both
sides, that seemed to slide into corresponding metal runners on the
wooden frame. A quick tug upwards released the cushion from the frame. |
|
|
|
 |
Every chair will be constructed a
bit differently, so I can’t tell you exactly how to take apart
your chair. My main advice here: be smart, be gentle. Walk
around the chair, flip it upside down, figure out which pieces
are connected and how. Use your noggin before you start trying
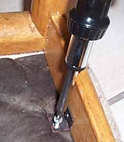
to tear things apart. The first step will most likely be to
unscrew any visible screws; this should allow you to begin
dissembling.
|
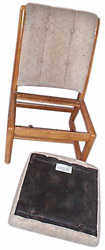
At this point I had taken apart the chair and had three components
lying on my floor: the wooden frame, the bottom cushion and the back
cushion. So far, so good. I was feeling quite pleased with myself.
Step two: Off with the old finish ...
I decided to start by re-finishing the wooden frame, since I figured
that would be the most time-intensive chore. The first essential, then,
was to remove the current finish, which was very chipped. Since I lacked
a power sander, I planned on sanding away the varnish and stain by hand,
with nothing more than a few pieces of medium-grained sandpaper.
more
fun and foibles
... !
--------------------------->
lounge . nourish .
host
. laze . home.
|
