 I
then proceeded to pin these pieces of fabric together on the chair. This
involved a lot of tugging and pulling, pinning and re-pinning. Once
I got all the pieces attached to each other in approximately the manner
that they’d be joined for the slipcover, it was relatively easy to
make adjustments to the fit (this was the re-pinning part). When I’d
finally managed to get everything to the point where it seemed to drape
relatively smoothly over the chair, I proceeded to draw seam lines at
every point where two pieces of fabric came together. Surprisingly
enough, I also had the
I
then proceeded to pin these pieces of fabric together on the chair. This
involved a lot of tugging and pulling, pinning and re-pinning. Once
I got all the pieces attached to each other in approximately the manner
that they’d be joined for the slipcover, it was relatively easy to
make adjustments to the fit (this was the re-pinning part). When I’d
finally managed to get everything to the point where it seemed to drape
relatively smoothly over the chair, I proceeded to draw seam lines at
every point where two pieces of fabric came together. Surprisingly
enough, I also had the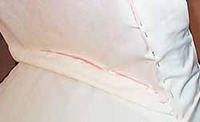 foresight to label each piece, so that I’d know what went where later
on. I unpinned the fabric, and trimmed all around the magic marker
lines, leaving a 1.5"-inch margin all around.
foresight to label each piece, so that I’d know what went where later
on. I unpinned the fabric, and trimmed all around the magic marker
lines, leaving a 1.5"-inch margin all around.
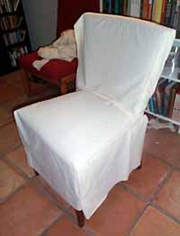
Step two: Cutting the Fabric
I now had in my hands a handy-dandy little pattern that I could use
to cut out all the pieces I’d need from the fabric I was using to make
the slipcover. I’d decided to go with a pure, ultra-white fabric – a
medium-weight fabric that was thick enough not to be completely
see-through, but not so stiff that it wouldn’t drape. With the pattern
pieces pinned to my fabric, I happily snipped away. I now had 8 pieces
of fabric, which, when sewn together in the proper formation, would
miraculously transform themselves into a lovely slipcover for my ugly
chair. Or so the theory went …
Step three: Pinning the Fabric
To begin with, I hemmed all the edges that would show once
the slipcover was finished. This meant the bottom and inside edges of
the two pieces for the back of the chair, along with the bottom of the
seat cushion piece and the two side panel pieces. If I’d been smart, I’d
also have finished the other edges, but alas … anything that wouldn’t
show went ignored, for now. The next step, then, was much like the
pattern-making step: pin all those suckers together to create a
perfectly tailored cover for that chair.
