8.
Using your ruler, measure along
the two sides of the bookshelf to mark a line in each spot where
you’ll want to install a shelf. 8.
Using your ruler, measure along
the two sides of the bookshelf to mark a line in each spot where
you’ll want to install a shelf.
9. Mount
the L-brackets just under each line. You’ll need two
L-brackets on each side, one near the front of the bookcase, and
one towards the back. Use the ½" screws to attach the
brackets to the sides of the bookshelves. Of course, you can now
stain, paint, or otherwise decorate your bookcase however you
see fit.
10.
Slide in your shelves (painted and stained, if you’d
like) so they rest on the L-brackets. Note: If you've made a
tall bookcase, you'll want to screw at least one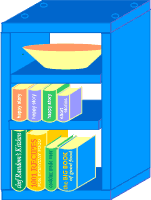 of the middle shelves to the
L-brackets to keep the sides
from bowing out. If you've made a very wide shelf, and it seems
a bit wobbly, screw L-brackets into the bottom and top pieces as
well; also, consider adding braces (they look like flat L's) to
the back joints for increased stability, or alternatively,
inserting another vertical divider.
of the middle shelves to the
L-brackets to keep the sides
from bowing out. If you've made a very wide shelf, and it seems
a bit wobbly, screw L-brackets into the bottom and top pieces as
well; also, consider adding braces (they look like flat L's) to
the back joints for increased stability, or alternatively,
inserting another vertical divider.
11. Add
books and enjoy!
get printer-friendly
instructions!
o |
Get
fancy:
Add casters to the
bottom for a mobile bookcase. This might be especially useful on
low, wide bookcases, which you could use as a makeshift
coffee table.
If you’re dead-set on wide
shelves,
add a
1"x2" or 1"x3" board that runs down the back
of the bookcase. You can
then screw L-brackets to that back spine, providing better
support for the shelves.
For a more involved modification,
make a corner bookshelf. Cut
the shelving into triangles, using ½" thick plywood (which
is much stronger than pine and comes in bigger sheets).
Add a door or curtains to
the front of the bookcase, so you can hide away your messy junk
from view.
|